

Stable version : 4.0.11120600
Latest version : 4.0.11120600
Supported browser versions
Firefox 2.0 - 10.*

Tutorial - Basic of Wired-Marker
Each part is explained with the sidebar layout set as "together" and the display format of context menu as "Default". Refer to "Switch over the sidebar layout", "Modify the display format of the context menu" for each setting.
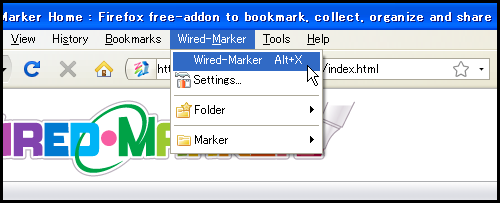
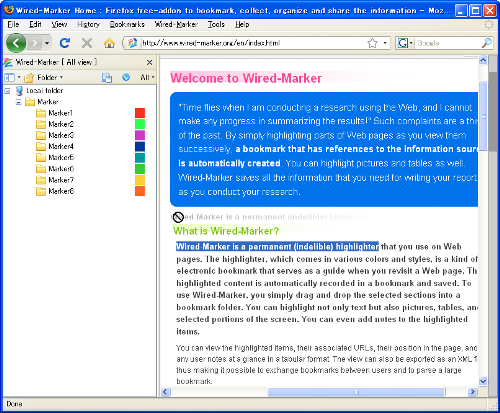
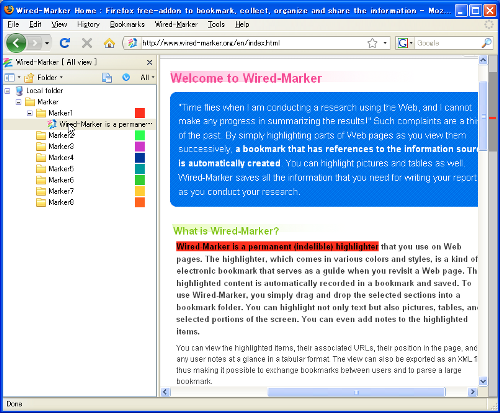
Display Wired-Marker sidebar
In order to utilize Wired-Marker, display the sidebar of Wired-Marker. The step to display side bar can be done by the shortcut key of "Alt + X", or by selecting "Wired-Marker" - "Wired Marker" from the menu.
Put marker on texts and graphics
It is possible to mark texts and graphics on web pages when utilizing Wired-Marker. Also, you can select an area on the web page and mark it as a graphic.
Putting markers 
Wired-Marker enables users to put markers on the web page. There are tree ways to put a marker.
Putting markers by drag & drop into the sidebar
1) Select the text that you would like to mark using a mouse.
2) Drag the selected text and drop into a folder.
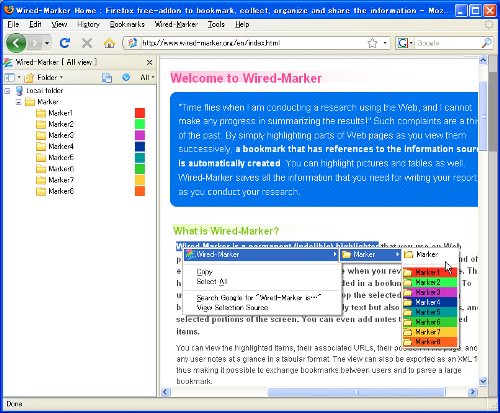
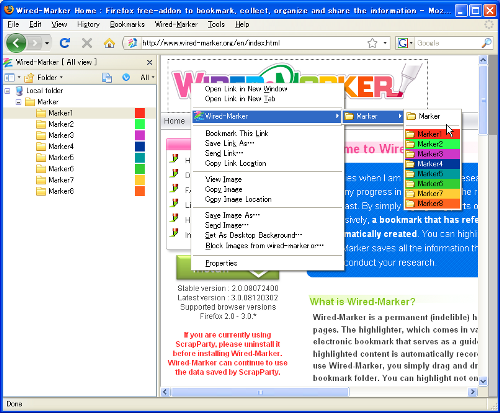
Putting markers by using right-click context menu
1) Select the text that you would like to mark using a mouse.
2) Right-click the selected text and select the marker that you would like to use from the "Wired-Marker" in the context menu.
*Structures of the right-click context menu are same with folder structures of Wired-Marker sidebar.
Putting markers by using the shortcut key
1) Set up the shortcut key beforehand. Refer below for how to set up.
2) Select the section of where you want to mark on the web page with a mouse.
3) Marker will be lined when you press the key selected for the shortcut key.
*You can use context menu and shortcut key even when Wired-Marker sidebar is not displayed. You can use the marker while displaying bookmark on the sidebar.
Back to the marker position
Wired-Marker enables users to go back to the marker position easily. There are two ways to go back to the marker position.
Back to the marker position by using sidebar
Clicking a marker object that you would like to refer will lead you to the marker position.
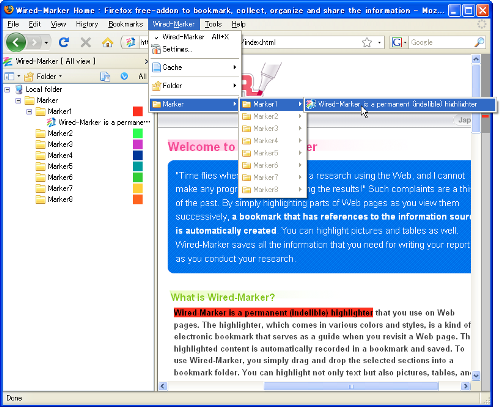
Back to the marker position by using Wired-Marker menu
Selecting a marker menu from the submenu of Firefox "Wired-Marker" menu will lead you to the marker position. The "Wired-Marker" menu has same structures with Wired-Marker sidebar.
Removing markers
There are two ways to remove a marker.
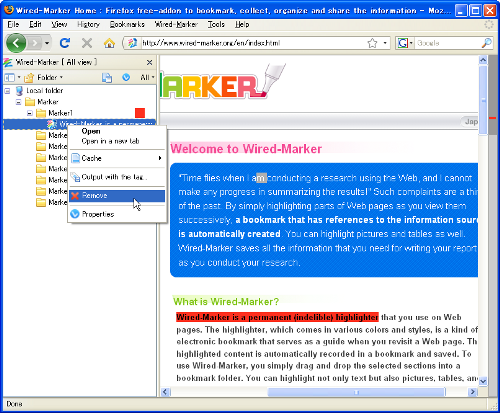
Removing a marker by removing a object in the Wired-Marker sidebar
1) Right-click on the marker's object that you would like to remove.
2) Select "Remove" from the context menu.
3) Click "Yes" button in the following confirmation dialog box.
*A marker object is also removable by clicking and pressing "Delete" key.
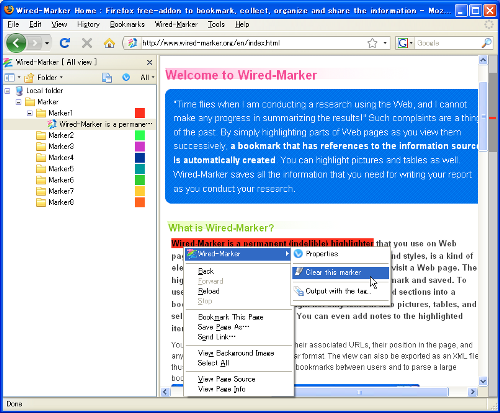
Removing a marker by using right-click context menu
1) Right-click on the marked text in a web page.
2) Select "Clear this marker" from Wired-Marker context menu.
Redraw the position of marker
You can reset the position of marker, extend, shorten or remark a different place.
1) Select the text that you would like to mark using a mouse.
2) Right-click on the marked place where you want to reset the marker.
3) Select "Alter marking range to selected range" from Wired-Marker context menu.
Marking images
Wired-Marker enables users to put marker not only on texts but also on images. There are two ways to put marker on images.
Putting marker on images by drag & drop into the sidebar
Drag an image you would like to mark into a folder in the sidebar.
Putting marker on a image by using right-click menu
Right-click an image that you would like to put a marker and select a marker you would like to put from "Wired-Marker" context menu.
Marking a capture image
Wired-Marker enables users to put a marker on a capture image of showing web page or image copied on the clipboard.
Marking a capture image of a web page
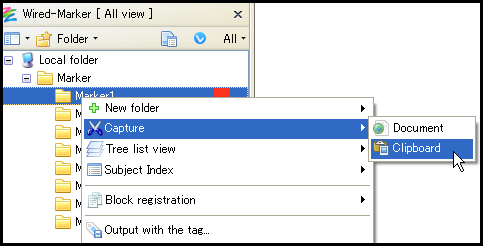
1) Right-click on a folder in which you would like to store the capture image.
2) Select "Capture" - "Document" from context menu.
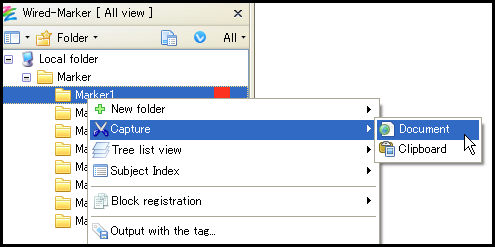
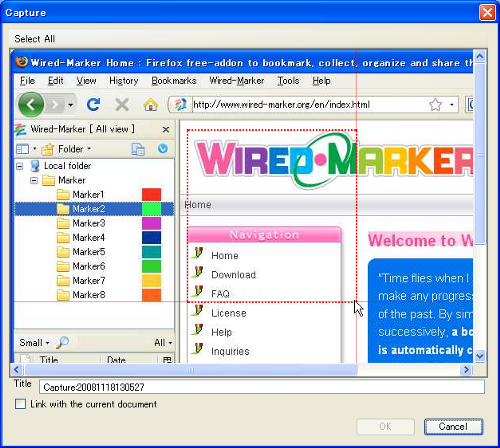
3) Select capture area on the dialog box showing image of web page.
4) Input marker name into the "Title" textbox.
5) When you have the "Link with the current document" checked, it will display the former web page of the image acquired when clicking the object created on the sidebar. When you uncheck the box, the image you have acquired will be displayed as it is.
6) The object will be created on the sidebar when you click "OK".
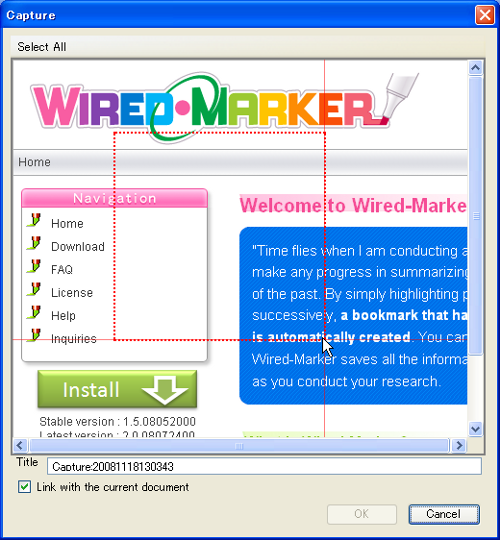
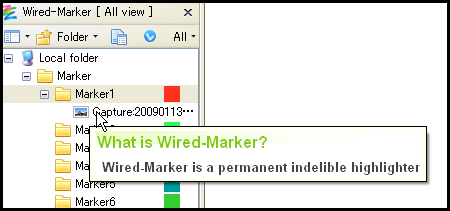
7) Graphic acquired will view as popup when putting mouse over the object.
Marking a capture image copied on the clipboard
1) Acquire the image on to the clipboard by PrintScreen button(*). (* For Windows only. For Mac, use "Command key + Shift key + 4")
2) Right-click on a folder in which you would like to store the capture image.
3) Select "Capture" - "Clipboard" from context menu.
4) Select capture area on the dialog box showing image of clipboard.
5) Input marker name into the "Title" textbox.
6) The object will be created on the sidebar when you click "OK".
7) Graphic acquired will view as popup when putting mouse over the object.
Register web page directly
It is possible to register a page directly into a folder without marking a web page with Wired-Marker.
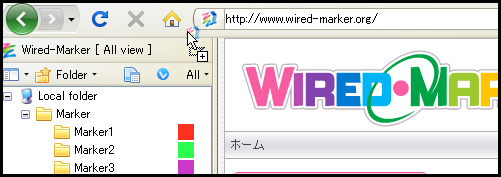
1) Drag the Icon displayed on the location bar.
2) Drop on to the folder you want to register the page.
Utilizing shortcut key
By installing a shortcut key, you can make a quick use of the marker.
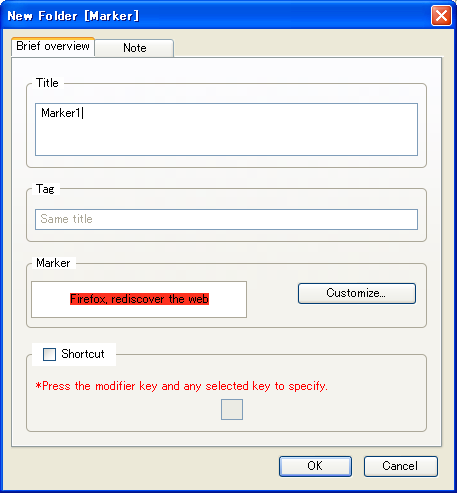
Setting of shortcut key
1) Right-click on the folder you want to make the shortcut key.
2) Pick "Properties" from the context menu.
3) Click the "Brief overview" tab and tick the checkbox for shortcut key. Press the key you want as the shortcut key and click ok.
*Go to the Setting dialog box under shortcut item for advanced setting of shortcut.
Marking by Shortcut Key
1) Select the section of where you want to mark on the web page with a mouse.
2) Marker will be lined when you press the key selected for the shortcut key.
Switch over the sidebar layout
The sidebar layout of Wired-Marker lets the user to choose the layout that is easy-to-use.
How to switch over
Layout of folder view and object list view in the sidebar is selectable from "right and left" , "up and down" , "together".
1) Click on  button located on the upper left portion of the sidebar.
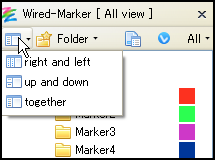
2) Select the layout from the menu.
3) Layout will be switched after the restart of Firefox.
right and left
Object (marker information) included in the selected folder from the folder view on the left will be displayed on the right object list view.
up and down
Object included in the selected folder from the folder view above will be displayed on the object list view below.
together
Object will be dispayed together in the folder tree inside the folder view.
Utilizing object list view
You can change the item that will display on the list.
Change the displayed item
Object list view will be displayed when sidebar layout is set as "right and left" or "up and down". Subject list view displays marker object as a list, which makes the management of marker object useful.
1) Click  button of the object list view.
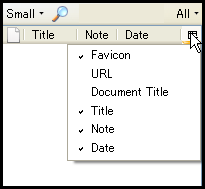
2) Check on the items you want to display.
Rearranging marker object
You can rearrange the marker object by clicking the column name displayed ahead of the object list view.
Putting markers
You can put marker by drag and drop to the object list view in the same way with drag and drop to the folders.
Back to the marker position
Double clicking a marker object that you would like to refer will lead you to the marker position
Removing markers
For object list view, you can make multiple selection of the marker you want to delete by using Ctrl key or Shift key and delete all at the same time.
For more detailed explanation of the object list view, click here.
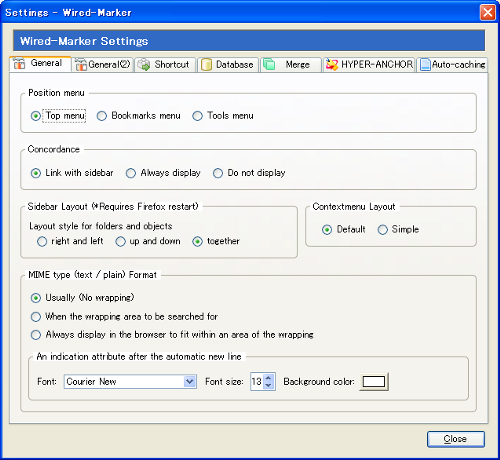
Modify the display format of the context menu
For the context menu that displays when you right-click on a folder or a web page, you can select the display format of the menu from "Default" or "Simple".
Only items that are used often will be displayed in the menu when you select "Simple".
Modify the display format
1) Select "Wired-Marker" - "Settings..." from Firefox menu.
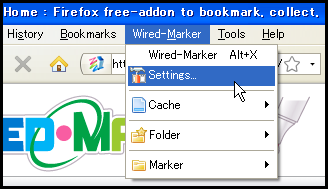
2) select the display format from "Contextmanu Layout" under "General" tab, then click "close".